When you're working in the kitchen, the right tools can make all the difference. One indispensable tool is the Milwaukee utility knife. To keep it functioning at its best, you need to know how to change the blade on a Milwaukee utility knife. This comprehensive guide will walk you through the process, ensuring your utility knife is always ready for action.

Why Regular Blade Replacement is Essential
Using a utility knife with a dull blade can be both frustrating and dangerous. A dull blade requires more force, increasing the risk of slips and injuries. Plus, a sharp blade ensures clean cuts, whether you're opening packages, cutting ropes, or prepping ingredients in the kitchen. Regularly changing the blade on your Milwaukee utility knife enhances both its efficiency and your safety.

Understanding Your Milwaukee Utility Knife
Before we get into the blade-changing steps, it's essential to understand the different components of your Milwaukee utility knife. Familiarizing yourself with these parts will make the process smoother and safer.
Components of a Milwaukee Utility Knife
- Blade release button: This allows you to safely remove the old blade.
- Blade storage compartment: Some Milwaukee models feature this for storing spare blades.
- Blade carriage: The section of the knife where the blade is housed.
- Handle: Designed ergonomically for a comfortable grip.

Step-by-Step Guide to Changing the Blade
1. Gather Required Tools and Safety Gear
Before you start, have a new utility blade ready. Milwaukee utility knives typically use standard utility blades, which are readily available at hardware stores. Additionally, for your safety, wear cut-resistant gloves and safety goggles.
2. Locate the Blade Release Button
The first step is to locate and press the blade release button. This button is usually on the side or top of the knife. Pressing it will release the old blade.
3. Remove the Old Blade
While holding the blade release button, carefully slide the old blade out of the blade carriage. Keep your other hand clear of the blade to avoid accidents.
4. Insert the New Blade
Carefully insert the new blade into the blade carriage, ensuring it is properly aligned. You should feel a click when it's securely in place.
5. Test the Blade
Once the new blade is in, release the blade release button and make a few trial cuts to ensure it's firmly secured and operates smoothly.
Pro Tips for Blade Maintenance
Extend the life and performance of your blades with these tips:
- Regularly inspect the blade for wear or damage.
- Store spare blades in a dry place to prevent rust.
- Replace the blade as soon as it shows signs of dullness.
FAQs
1. How often should I change the blade on my Milwaukee utility knife?
The frequency of blade changes depends on your usage. For heavy-duty tasks, you might need to replace the blade more often. Regular inspections will help you determine when it's time for a new blade.
2. Can I use any brand of blade in my Milwaukee utility knife?
Milwaukee utility knives are designed for standard utility blades. While it's best to use Milwaukee-brand blades, other standard blades should fit fine. Just ensure the blade dimensions match before purchasing.
3. What should I do if the blade doesn't release?
If the blade release mechanism isnt working, it might be due to debris or damage. Clean the knife thoroughly and check for visible damage. If the issue persists, contact Milwaukee customer support or consult the user manual.
As an Amazon Associate, I earn from qualifying purchases.
Changing the blade on your Milwaukee utility knife is crucial for maintaining its effectiveness and your safety. By following this guide, you can ensure your utility knife remains a reliable tool in your kitchen and beyond. For more on Milwaukee tools and utility blade handling, visit Milwaukee's official website.
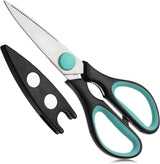
For more tips on kitchen knife maintenance, check out maintaining cleavers, clean and maintain kitchen scissors, and maintaining chef knives.
