The Ultimate Guide: How to Sharpen a Kirosaku Knife Effectively
Are you tired of struggling with a dull Kirosaku knife in the kitchen? Do you want to learn how to sharpen it effectively and bring back its razor-sharp edge? Look no further! In this ultimate guide, we will walk you through the step-by-step process of sharpening a Kirosaku knife like a pro.
Why is Sharpening a Kirosaku Knife Important?
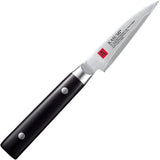
A Kirosaku knife is a versatile and essential tool in any kitchen. However, over time, the blade can become dull and lose its sharpness. This can make cutting and slicing tasks more difficult and dangerous. Sharpening your Kirosaku knife regularly not only ensures optimal performance but also enhances safety in the kitchen.
Step 1: Gather the Necessary Tools
Before you begin sharpening your Kirosaku knife, it's important to gather all the necessary tools. You will need:
- Sharpening stone or whetstone
- Water or honing oil (depending on the type of stone)
- Towel or cloth
- Knife guide (optional)
Step 2: Prepare the Sharpening Stone
Next, you need to prepare the sharpening stone. If you're using a whetstone, soak it in water for about 10-15 minutes. If you're using an oilstone, apply a few drops of honing oil to the surface.
Step 3: Find the Correct Angle
Now, it's time to find the correct angle for sharpening your Kirosaku knife. The ideal angle is typically between 15-20 degrees. You can use a knife guide to help you maintain a consistent angle throughout the sharpening process.
Step 4: Start Sharpening
Begin by holding the knife handle firmly and placing the blade against the sharpening stone at the desired angle. Apply light pressure and move the blade back and forth across the stone, starting from the base and working towards the tip. Repeat this motion several times on each side of the blade.
Step 5: Test the Sharpness
After sharpening, it's important to test the sharpness of your Kirosaku knife. You can do this by gently slicing through a piece of paper or a tomato. If the knife glides effortlessly and cuts smoothly, it's sharp. If not, repeat the sharpening process.
Step 6: Strop the Blade (Optional)
If you want to further refine the edge of your Kirosaku knife, you can strop the blade. Stropping involves running the blade along a leather or fabric strop to polish and align the edge.
Step 7: Maintain the Sharpness
Once you've sharpened your Kirosaku knife, it's important to maintain its sharpness. Avoid cutting on hard surfaces like ceramic or glass, as this can dull the blade. Regularly hone the knife with a honing rod or sharpening stone to keep the edge in top condition.
Conclusion
Sharpening a Kirosaku knife effectively is a skill that every kitchen professional should master. By following the step-by-step process outlined in this guide, you can ensure your Kirosaku knife remains razor-sharp and ready for any culinary challenge. Remember to always prioritize safety and take your time when sharpening your knife. Happy sharpening!
