The Ultimate Guide: How to Install a Magnetic Knife Holder for Food Lovers
For those who find joy in the culinary arts, a well-organized kitchen is a must. The right tools, easily accessible, can make the difference between a frustrating cooking experience and a delightful one. One such tool that is often overlooked is the magnetic knife holder. This handy kitchen accessory not only provides a stylish and convenient way to store your knives, but it also keeps them within easy reach whenever you need them. In this guide, we will walk you through the process of installing a magnetic knife holder, enhancing your kitchen's functionality and aesthetics.
Why Choose a Magnetic Knife Holder?
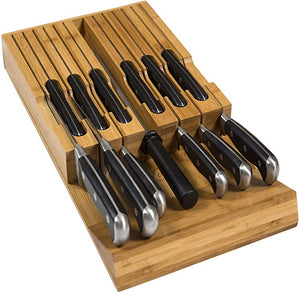
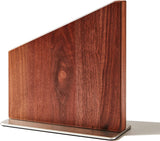
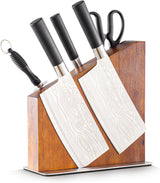
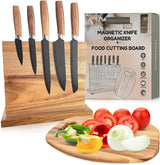
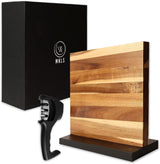
Before we delve into the installation process, it's important to understand why a magnetic knife holder is a valuable addition to any kitchen. Traditional knife blocks, while functional, can consume valuable counter space and make it challenging to find the right knife when you need it. A magnetic knife holder, on the other hand, frees up counter space and keeps your knives organized and easily accessible. Additionally, it adds a sleek and modern touch to your kitchen decor. To learn more about the benefits of a magnetic knife holder, check out our blog post here.
Step-by-Step Guide: How to Install a Magnetic Knife Holder
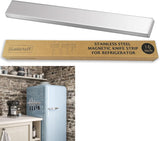
Now that you understand the benefits of a magnetic knife holder, let's delve into the installation process. Here are the simple steps to follow to install your magnetic knife holder:
Step 1: Choose the Right Location
The first step is to choose the right location for your magnetic knife holder. Look for a wall space that is easily accessible and close to your food preparation area. Ensure the wall is clean and free from any debris or grease. For more tips on kitchen organization, visit our blog post here.
Step 2: Measure and Mark
Once you have chosen the location, use a tape measure to determine the desired height for your knife holder. Mark the spot on the wall with a pencil or a piece of masking tape. This ensures that your knife holder will be at a comfortable height for you to reach your knives easily.
Step 3: Find the Studs
Next, you need to locate the studs in the wall. This is crucial because you want to ensure that your knife holder is securely attached. Use a stud finder to locate the studs and mark their positions on the wall. If you're unsure about how to use a stud finder, check out our blog post here for a detailed guide.
Step 4: Pre-Drill Holes
Using a drill and a small drill bit, pre-drill holes at the marked spots for the screws. This will make it easier to attach the knife holder to the wall and prevent the wall from cracking or chipping when you insert the screws.
Step 5: Attach the Knife Holder
Now it's time to attach the knife holder to the wall. Line up the holes on the knife holder with the pre-drilled holes on the wall and use a screwdriver or a drill to secure it in place. Make sure the screws are tight and the knife holder is level. If you're unsure about how to use a drill, check out our blog post here for a detailed guide.
Step 6: Test the Strength
Once the knife holder is securely attached, give it a gentle tug to make sure it is holding the knives firmly. If everything looks good, you're ready to start organizing your knives on the magnetic strip. For more information on how to use a magnetic strip, visit our blog post here.
Additional Tips for Using a Magnetic Knife Holder
Now that you have successfully installed your magnetic knife holder, here are a few additional tips to help you make the most of this kitchen accessory:
- Arrange your knives in a way that makes them easily accessible. You can group them by size or type of knife. This not only makes it easier to find the right knife when you need it but also adds an aesthetic appeal to your kitchen.
- Make sure to clean your knives before placing them on the magnetic strip to prevent any food residue from accumulating. This not only keeps your knives clean but also extends the lifespan of the magnetic strip.
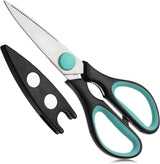
- Consider using a magnetic knife holder for other metal kitchen tools, such as scissors or metal spatulas. This can help you further declutter your kitchen and keep your tools organized. For more ideas on how to use your magnetic knife holder, check out our blog post here.
- Regularly clean the magnetic strip to remove any dust or debris that may accumulate over time. This ensures that your magnetic strip maintains its magnetic strength and keeps your knives securely in place.
With these tips in mind, you can now enjoy the convenience and organization that a magnetic knife holder brings to your kitchen. Say goodbye to cluttered countertops and hello to a sleek and functional storage solution for your knives. To make a purchase, visit our product page here.
Conclusion
A magnetic knife holder is a must-have accessory for any food lover who wants to keep their kitchen organized and their knives within easy reach. By following the step-by-step guide in this article, you can easily install a magnetic knife holder in your kitchen and enjoy the benefits it brings. Remember to choose the right location, measure and mark, find the studs, pre-drill holes, attach the knife holder securely, and test its strength. With a little effort, you can transform your kitchen into a well-organized and efficient space for all your culinary adventures. Happy cooking!

