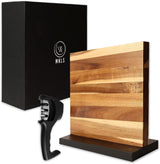
The Ultimate Guide: How to Install a Magnetic Knife Holder
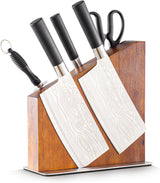
Are you tired of rummaging through your kitchen drawers, searching for the right knife every time you cook? Or maybe you're concerned about the safety of storing sharp knives in a traditional knife block? If so, it's time to consider installing a magnetic knife holder in your kitchen. Not only does it provide a convenient and space-saving storage solution, but it also adds a touch of modern elegance to your culinary space.
In this guide, we'll walk you through the step-by-step process of installing a magnetic knife holder. Whether you're a professional chef or a passionate home cook, this article will help you transform your kitchen into an organized and efficient workspace.
Why Choose a Magnetic Knife Holder?
Before we dive into the installation process, let's explore why a magnetic knife holder is a great addition to any kitchen. Here are some of the key benefits:
- Space-saving: A magnetic knife holder allows you to free up valuable counter and drawer space by securely mounting your knives on the wall. This is a great way to maximize your kitchen's potential and make the most of your available space.
- Easy access: With a magnetic knife holder, your knives are always within reach, making meal preparation more efficient. No more fumbling around in drawers or knife blocks - your tools are right there when you need them.
- Safe storage: Unlike traditional knife blocks, a magnetic knife holder keeps your knives securely in place, reducing the risk of accidents and injuries. This is especially important if you have children in the house, as it keeps sharp objects out of their reach.
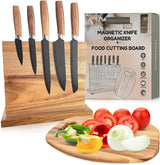
- Visual appeal: Magnetic knife holders add a sleek and modern touch to your kitchen, showcasing your beautiful knife collection. They're not just practical - they're also a stylish addition to your home.
What You'll Need
Before you begin the installation process, gather the following tools and materials:
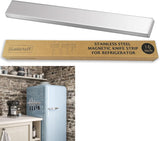
- A magnetic knife holder
- A measuring tape
- A pencil
- A level
- Wall anchors and screws
- A power drill
You can find a variety of magnetic knife holders in our online store. Choose one that suits your kitchen's style and your personal preferences.
Step-by-Step Guide
Step 1: Choose the Right Location
The first step in installing a magnetic knife holder is to choose the perfect location. Consider the following factors:
- Accessibility: Select a spot that is easily accessible and within arm's reach while you're working in the kitchen. This will make your cooking process much smoother and more efficient.
- Wall space: Ensure that you have enough wall space to accommodate the length of the magnetic knife holder. Measure the space carefully to avoid any surprises during the installation process.
- Height: Position the knife holder at a height that is comfortable for you to reach and retrieve the knives. This is especially important if you're shorter or taller than average.
Once you've identified the ideal location, use a measuring tape to mark the spot with a pencil. Be sure to double-check your measurements before moving on to the next step.
Step 2: Prepare the Wall
Before you start drilling, it's important to prepare the wall to ensure a secure installation. Follow these steps:
- Locate the studs: Use a stud finder to locate the studs in the wall. Mounting the knife holder on a stud provides maximum stability. If you're not sure how to use a stud finder, check out our guide.
- Mark the screw holes: Place the magnetic knife holder against the wall and use a pencil to mark the screw holes. This will help you drill the holes in the right places.
- Pre-drill the holes: Use a power drill with the appropriate drill bit to pre-drill the holes for the screws. If you're not drilling into a stud, use wall anchors for added support. This will ensure that your knife holder stays securely in place, even under the weight of your knives.
Step 3: Mount the Knife Holder
Now it's time to mount the magnetic knife holder on the wall. Follow these steps:
- Align the knife holder: Hold the knife holder against the wall, aligning the screw holes with the pre-drilled holes. This can be a bit tricky, so take your time and make sure everything lines up perfectly.
- Insert the screws: Insert the screws through the holes and tighten them using a screwdriver or a power drill. Be careful not to overtighten the screws, as this could damage the knife holder or the wall.
- Check for stability: Give the knife holder a gentle tug to ensure that it's securely mounted on the wall. If it wobbles or moves, you may need to tighten the screws or install additional wall anchors.
Step 4: Organize Your Knives
With the magnetic knife holder securely installed, it's time to organize your knives. Follow these tips:
- Arrange the knives: Place the knives on the magnetic strip, ensuring that the blades are facing upward and away from you. This will prevent accidental cuts and injuries.
- Leave space between knives: To prevent the knives from scratching each other, leave a small gap between each knife. This will also make it easier to grab the knife you need without disturbing the others.
- Balance the weight: Distribute the weight of the knives evenly across the magnetic strip to maintain stability. Heavier knives should be spaced out, with lighter knives in between.
Conclusion
Installing a magnetic knife holder is a simple and effective way to declutter your kitchen and keep your knives within easy reach. By following the step-by-step guide outlined in this article, you'll be able to install a magnetic knife holder like a pro. Say goodbye to messy drawers and unsafe knife blocks, and say hello to a well-organized and stylish kitchen!
For more tips on kitchen organization, check out our other articles on kitchen organization, magnetic holders, and knife holders.
