The Ultimate Guide: How to Install a Magnetic Knife Holder
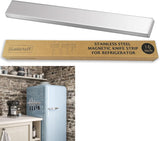
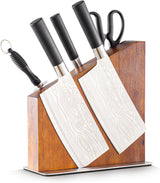
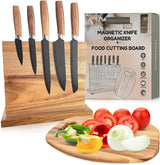
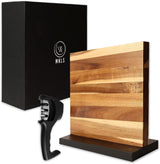
Whether you're a passionate home cook or a professional chef, having your kitchen tools within arm's reach is crucial. A magnetic knife holder is a stylish and practical solution for storing your knives. It not only adds a touch of elegance to your kitchen but also ensures your knives are securely stored and easily accessible. This comprehensive guide will walk you through the steps to install a magnetic knife holder in your kitchen.
Why Choose a Magnetic Knife Holder?
Before we get into the installation process, it's important to understand why a magnetic knife holder is a popular choice among kitchen professionals. Unlike traditional knife blocks or drawers, a magnetic knife holder provides visibility and easy access to your knives. This not only saves you time when looking for the right knife but also reduces the risk of accidents when reaching into a drawer filled with sharp objects. Additionally, a magnetic knife holder helps keep your knives in top condition by preventing them from clashing against each other, which can cause dulling or chipping. For a more detailed understanding of the benefits of a magnetic knife holder, read our blog post here.
Step 1: Choose the Perfect Location
The first step in installing a magnetic knife holder is to find the ideal location. You should pick a spot that is easily accessible and within reach while you're cooking. Ideally, it should be mounted on a wall or backsplash near your food preparation area. Make sure to choose a location where the knives won't interfere with other kitchen tools or appliances. For more tips on choosing the right location for your magnetic knife holder, visit our blog post here.
Step 2: Gather the Necessary Tools
Once you've decided on the location, gather the tools needed for the installation. You will need a drill, screws, a level, a pencil, and a measuring tape. Having these tools on hand will ensure a smooth and secure installation process.
Step 3: Mark the Mounting Holes
Using a pencil, mark the mounting holes on the wall or backsplash. Position the magnetic knife holder against the wall, make sure it is level, and mark the spots where the screws will go. This will serve as a guide when you're drilling the holes.
Step 4: Drill the Holes
Use a drill bit that is slightly smaller than the screws to drill the holes at the marked spots. Be careful not to drill too deep or too wide, as this can damage the wall or backsplash. If you're unsure about drilling into your wall, it's recommended to seek professional help.
Step 5: Mount the Magnetic Knife Holder
Once the holes are drilled, it's time to mount the magnetic knife holder on the wall. Align the holder with the drilled holes and insert the screws through the holder and into the wall, tightening them until the holder is securely attached.
Step 6: Test the Strength
After installing the magnetic knife holder, it's important to test its strength. Take one of your knives and gently place it against the holder. If it holds the knife securely, you're good to go. If not, you may need to tighten the screws or adjust the holder's position.
Step 7: Arrange Your Knives
With your magnetic knife holder installed and secure, it's time to arrange your knives. Place each knife on the holder, making sure that the blade is securely attached to the magnetic surface. Organize the knives in a way that works best for you, whether it's by size, type, or frequency of use. For more tips on organizing your knives, check out our blog post here.
Conclusion
Installing a magnetic knife holder is a simple and effective way to store your knives safely and conveniently. By following the step-by-step process outlined in this guide, you can enjoy the convenience and sophistication of a magnetic knife holder in your kitchen. Say goodbye to cluttered drawers and dull knives, and welcome a sleek and organized storage solution. Ready to install your own magnetic knife holder? Make your purchase here.
