Understanding the ins and outs of kitchen gadgets can be as fulfilling as cooking itself. Are you a kitchen hobbyist who's excited to unravel the mechanics of a Pampered Chef self-sharpening knife? You're in the right place. This comprehensive guide will walk you through the process of taking apart a Pampered Chef self-sharpening knife, ensuring that you not only learn the process but master it.

Introduction to Pampered Chef Self-Sharpening Knife
A Pampered Chef self-sharpening knife is a kitchen technology marvel. It features an integrated sharpening system right in its protective sheath. The design is impressive, allowing for sharpening with each use, maintaining a sharp edge, and reducing the need for manual sharpening.

Why Take Apart Your Pampered Chef Self-Sharpening Knife?
Why would anyone want to dismantle such a nifty tool? Here are some excellent reasons:
- Maintenance: Taking the knife apart helps keep it clean and in optimal condition.
- Repair: If the knife seems dull or not performing well, disassembly might reveal the problem. Learn more about knife maintenance.
- Customization: For enthusiasts, this allows the chance to tweak and experiment with the mechanism.

Tools You'll Need
Before diving in, gather these tools:
- Screwdriver
- Pliers
- Cleaning cloth
- Lubricant
Step-by-Step Guide to Taking Apart Your Knife
Step 1: Safety First
Ensure your safety by wearing gloves and working in a well-lit area. Safety should be your primary concern.
Step 2: Remove the Blade from the Sheath
Start by carefully removing the blade from its protective sheath. This is where the self-sharpening magic happens. Pay close attention to how the blade sits within the sheath, as this will be important for reassembly.
Step 3: Inspect the Sharpening Mechanism
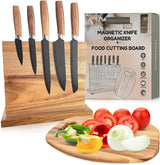
Once the blade is out, take a closer look at the sharpening mechanism inside the sheath. Pampered Chef employs a smart technology that uses ceramic stones. Inspect for any visible issues like chipping or displacement. You can learn more about similar technologies from the benefits of using a magnetic knife holder.
Step 4: Disassemble the Sheath
Using a screwdriver, remove the screws that hold the sheath together. Carefully separate the two halves. Note the position of every component as you'll need to place them back correctly during reassembly.
Step 5: Clean All Components
Take a soft cloth and some cleaning solution to gently clean all parts. Any accumulated residue can affect the knife's efficiency, so be thorough. For more tips, see our ultimate guide to maintaining chef knives.
Step 6: Lubricate Moving Parts
A little lubrication can go a long way in ensuring the smooth operation of your knife. Apply a small amount of lubricant to the moving parts within the sheath.
Step 7: Reassemble the Knife
Carefully put all components back in their original positions. Ensure the sharpening stones are aligned properly. Screw the sheath back together and reinsert the blade. Discover more on this process from our blog on the ultimate guide to maintaining chef knives.
Frequently Asked Questions (FAQs)
What to do if the knife doesn't sharpen properly?
If your knife isn't sharpening correctly, recheck the alignment of the ceramic stones. They need to be perfectly positioned to work effectively.
Where can I find replacement parts?
Replacement parts can be purchased directly from the Pampered Chef website or from Amazon. Ensure that the parts are specifically for Pampered Chef knives.
Can I take apart the knife without professional help?
Absolutely! This guide aims to make the process as simple as possible. However, if you're unsure at any stage, don't hesitate to seek professional advice. For more help, check out how to improve your knife skills.
As an Amazon Associate, I earn from qualifying purchases.
