As a kitchen professional, you probably already know the importance of precision and proper tools in your craft. A serrated bread knife is one of the most versatile and essential tools in any kitchen. However, like all blades, it can become dull over time, affecting its performance. To maintain your knife's efficiency and your reputation as a professional, you need to understand how to sharpen a serrated bread knife correctly. Lets dive into the techniques, tools, and tricks to restore your serrated knife to its pristine condition.

Understanding Serrated Bread Knives
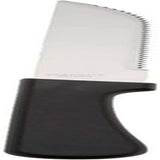
Before diving into sharpening methods, lets first distinguish what makes a serrated bread knife unique. These knives have a saw-like edge with pointed serrations that are excellent for cutting through bread without crushing it. Unlike straight-edged knives, serrated blades have two main cutting surfaces: the teeth and the gullets (those valley-like indentations between teeth). These features make them highly efficient but also tricky to sharpen properly. Proper understanding of these components is crucial when learning how to sharpen a serrated bread knife.
Why Sharpen Your Serrated Bread Knife?
Although serrated knives do retain their edges longer than straight-edged knives, they are not immune to dulling. A dull serrated knife can tear rather than cut cleanly, leading to frustration and compromise in presentationboth of which are unacceptable in a professional kitchen.
- Enhanced Performance: A sharpened serrated knife can slice effortlessly through all types of bread and other delicate items.
- Extended Lifespan: Regular maintenance ensures your knife lasts longer.
- Safety: Surprisingly, dull blades are often more dangerous than sharp ones as they require more force to cut, increasing the risk of accidents.
Now that you know why its crucial to sharpen your knife, lets break down the steps.
Tools You'll Need
The tools specific to sharpening serrated knives are limited but specialized. Heres what youll need:
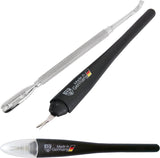
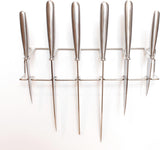
- Serrated Knife Sharpener: These are often tapered rods designed to fit perfectly into a knifes serrations.
- Sharpening Rod: Includes ceramic or diamond-coated variants which are highly effective for honing serrated blades.
- Honesty: Youll need patience and precision as sharpening serrated knives involve delicate work.
- Different Types of Knives: A valuable resource to know more about specific knife details.
Step-by-Step Process: How to Sharpen a Serrated Bread Knife
Step 1: Identifying Dull Serrations
Start by inspecting the knifes blade under good lighting. Look out for burrs, dents, or an apparent lack of sharpness along the cutting teeth and valleys. Run your finger gently (and cautiously) down the edge to feel for obvious dull spots.
Step 2: Select the Right Sharpening Rod
Choose a sharpening rod that matches the size of your serrations. Using an oversized or undersized rod can damage the knifes edge. A diamond-coated rod works wonders for heavily used knives.
Step 3: Sharpen Each Serration Individually
This is the most time-intensive step but also the most crucial. Insert the sharpening rod into each gullet (the valley beneath the serrated teeth). Gently slide the rod in and out multiple times, following the angle of the serration.
Ensure even pressure and avoid altering the serration's original angle. Skipping a serration will create an uneven edge.
Step 4: Hone the Flat Side
After sharpening all serrations, flip the knife and lightly hone the flat side using the sharpening rod. This step is critical to remove burrs or fragments created during the sharpening process. Be cautious not to over-sharpen; otherwise, you risk thinning the blade.
Step 5: Rinse and Test
Once sharpened, rinse the knife under warm water to remove any debris. Dry the blade with a microfiber cloth, ensuring no moisture remains. Test the blade on a loaf of bread to confirm its sharpness and smooth cut.
Professional Maintenance Tips
As a professional, maintaining your serrated bread knife goes beyond sharpening. Follow these simple care tips to extend the life of your knife:
- Handwash your knife with mild soap and water instead of placing it in a dishwasher. For more cleaning tips, check out this detailed guide.
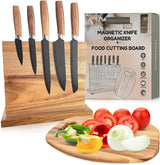
- Store your knife in a protective sleeve or magnetic rack to prevent dulling.
- Ensure an appropriate cutting board is used to reduce wear and tear.
- For choosing the right cutting board, read cutting boards for specific needs.
Common Mistakes to Avoid
Even seasoned professionals can make errors. Avoid these common pitfalls when learning how to sharpen a serrated bread knife:
- Skipping Regular Maintenance: Even if the blade appears sharp, periodic checks are essential.
- Using the Wrong Tool: A plain knife sharpener wont suffice for serrated blades.
- Overusing Force: Excessive pressure can deform the serrations, making them ineffective.
FAQs
1. Can regular knife sharpeners be used to sharpen a serrated bread knife?
No, standard knife sharpeners are not suitable. You need tools specifically designed for serrated edges, such as tapering rods.
2. How often should I sharpen my serrated knife?
Although serrated knives hold their edge longer, its good practice to inspect and sharpen them every six months or earlier if heavily used.
3. Is it difficult to maintain serrated knives compared to straight-edged knives?
Serrated knives require more precision to maintain due to their unique design. However, with practice and the right tools, it becomes manageable even for beginners.
Want more pro tips? Check out our thoughts on maintaining knife sets.
This article contains affiliate links. We may earn a commission at no extra cost to you.
