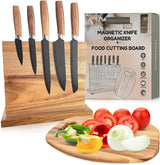
Creating your own cutting board not only adds a personal touch to your kitchen but also elevates your culinary experience. If you are a professional in the kitchen, understanding how to make a large cutting board can help you customize your workspace to suit your needs. Whether you're slicing vegetables or preparing meats, a large cutting board provides the ample surface area necessary for efficiency and safety.
In this article, we'll dive deep into the materials, tools, and step-by-step instructions you'll need to successfully create a large cutting board that meets your specific requirements.
Choosing the Right Materials
Before you start your project, selecting the appropriate materials is crucial. The type of wood you choose will affect the functionality, durability, and aesthetics of your board. Here are some popular options for large cutting boards:
- Maple: Known for its hardness, maple is resistant to knife marks and maintains its appearance over time.
- Walnut: This hardwood offers a rich color and unique grain patterns, making it visually appealing and functional.
- Cherry: Cherry wood has excellent durability and adds a warm tone to your kitchen.
Bonus Tip:
It's important to avoid using softwoods like pine, as they can dent and splinter easily.
Essential Tools for Crafting Your Cutting Board
Once you've selected your wood, gather the necessary tools to craft your large cutting board:
- Table saw: For precise cutting of wood pieces.
- Router: A router can smooth edges and create decorative patterns on your board.
- Sander: Sanding your board ensures a smooth, safe surface for food preparation.
- Wood glue: To bond different wood pieces together.
- Clamps: Essential for holding your pieces together while the glue dries.
Step-by-Step Process to Create Your Cutting Board
Now that you have your materials and tools ready, let's get started:
- Step 1: Cut your wood into desired dimensions using a table saw. Aim for a size that fits comfortably in your workspace.
- Step 2: Arrange the pieces to your liking, experimenting with different orientations and patterns.
- Step 3: Apply wood glue between the joints of your pieces and assemble them.
- Step 4: Use clamps to secure the board while it dries, typically for about 24 hours.
- Step 5: Once dry, use a router to smooth any edges and create rounded corners.
- Step 6: Sand the board starting with coarse-grit sandpaper and moving to finer grits for a smooth finish.
- Step 7: Finally, apply a food-safe mineral oil to enhance the grain and protect your wood. Remember to reapply oil periodically to maintain the boards quality.
Maintaining Your Cutting Board
After creating your large cutting board, proper maintenance is key to its longevity. Here are a few tips:
- Clean the board after each use with warm water and mild soap. Avoid soaking or placing it in the dishwasher.
- To maintain its surface, regularly apply mineral oil.
- For tough stains, sprinkle coarse salt and gently scrub with a lemon half.
Frequently Asked Questions (FAQ)
What wood is the best for cutting boards?
Hardwoods like maple, walnut, and cherry are ideal for cutting boards due to their durability and low knife damage.
How do I clean and sanitize my cutting board?
Use warm soapy water for regular cleaning. For sanitizing, a solution of vinegar and water can be effective.
Can I use my cutting board for raw meat?
Yes, but be sure to clean it thoroughly afterward to avoid cross-contamination.
Creating your own large cutting board can be a rewarding project that not only meets your culinary needs but also provides a personal touch to your kitchen. Now that you know how to make a large cutting board, its time to start crafting. A well-crafted board can elevate your food preparation experience and showcase your skills as a kitchen professional.
As an Amazon Associate, I earn from qualifying purchases.
