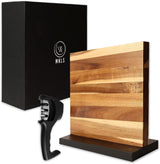
When it comes to woodworking, few tasks are as fulfilling as learning how to make a cutting board from one piece of wood. This guide is tailored for kitchen professionals who are looking to elevate their culinary experience with a remarkable piece of equipment. A cutting board crafted from one solid piece of wood not only enhances your kitchen aesthetics but also offers superior durability.
This project is perfect for both novice and seasoned woodworkers. In this article, we will provide you with exclusive techniques and life-changing tips that will make your cutting board project not only feasible but also enjoyable.
:max_bytes(150000):strip_icc()/prevent-cutting-board-slipping-1123-c9837c7f958745b792c2b115c7d7bccd.jpg)
Understanding the Basics
Before diving into the creation process of a cutting board, it is important to grasp its significance in a professional kitchen. A cutting board is more than just a surface; it is an essential tool that ensures safety and efficiency while preparing meals. Choosing the right type of wood is crucial for functionality and longevity.
Choosing the Right Wood
Opt for hardwoods such as maple, walnut, or cherry. These woods are known for their density and durability. Avoid using softwoods, as they tend to scar easily and absorb moisture. For detailed insights on the varieties of woods available, check out this resource.
Essential Tools and Materials
To successfully make a single-piece cutting board, gather the following tools and materials:
- Wood (choose your preferred hardwood)
- Table saw or circular saw
- Sandpaper (various grits)
- Finish (food-safe mineral oil or butcher block conditioner)
- Clamps (if joints are needed)
- Scraper or chisel (for detail work)
Step-by-Step Guide to Making a Cutting Board
Now that you have your materials ready, follow these life-changing steps:
Step 1: Prepare Your Wood
Start by choosing the right dimensions for your cutting board. Decide the width and length based on your kitchen needs. Use your table saw to cut the wood to the desired size. Ensure the pieces are flat and smooth for better adhesion.
Step 2: Sanding
Next, sand all surfaces of the wood using progressively finer grits of sandpaper. Start with a lower grit (e.g., 80) and move up to a higher grit (e.g., 220). This step is critical for achieving a smooth finish.
Step 3: Applying Finish
Once sanding is completed, clean the surface to remove dust. Apply a generous amount of food-safe mineral oil or butcher block conditioner to finish your cutting board. This not only protects the wood but also enhances its color. For further guidance on oiling and maintaining your cutting board, refer to this article.
Step 4: Final Touches
Inspect the board for any rough spots and sand them down as necessary. Afterward, give the board several hours to absorb the oil. Wipe off any excess after it has settled.

Maintaining Your Cutting Board
To ensure your cutting board lasts for years, proper maintenance is key. Clean it regularly using mild soap and warm water. Avoid soaking the board, as it can cause damage. For thorough sanitization methods, check out our guide on sanitizing wooden boards.
Frequently Asked Questions
- What type of wood is best for cutting boards? Hardwoods like maple, walnut, and cherry are ideal due to their durability.
- How often should I oil my cutting board? Its recommended to oil your cutting board at least once a month or whenever it appears dry.
- Can I wash my wooden cutting board in the dishwasher? No, it is advisable to avoid dishwashers as water can damage wooden boards.
For additional tips on getting rid of persistent odors, consider checking out this helpful guide.
As an Amazon Associate, I earn from qualifying purchases.
