Are you ready to elevate your cheese presentation skills? Knowing how to make a cheese cutting board not only showcases your culinary creativity but also leaves a lasting impression on everyone at your dinner parties. In this article, we will take you on a journey filled with detailed steps, essential tools, and tips that will change the way you think about cheese serving.
Creating the perfect cheese cutting board is a blend of art, precision, and an understanding of the materials involved. In the kitchen, especially as a professional chef, having a beautiful yet functional cheese board can enhance your plate and create an inviting atmosphere. Trust us, once you understand how to make a cheese cutting board, youll never go back to traditional serving methods.

Why You Need a Quality Cheese Cutting Board
With the rising popularity of gourmet cheese, a cutting board specifically designed for this purpose is becoming essential in every kitchen. A dedicated cheese board not only makes serving cheese stylish but also allows for easy slicing of various texturesfrom soft brie to hard parmesan. Moreover, it helps prevent cross-contamination with other foods.
Materials You Will Need
When considering how to make a cheese cutting board, the materials you select will affect the quality and longevity of the board. Here are the essential materials:
- Wood Type: Hardwood is recommended, with options such as maple, walnut, or bamboo.
- Food-Safe Finish: Choose a mineral oil or beeswax to protect the wood.
- Tools: A saw, sandpaper, measuring tape, and a food-safe sealant.
Step-by-Step Guide
1. Design Your Board
The first step in learning how to make a cheese cutting board is to decide on the size and shape. A rectangular board usually provides ample space for cheese, but you may also opt for a round or unique oval shape. Sketch your design to visualize your desired outcome.
2. Select Your Wood
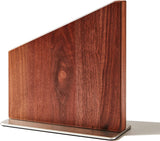
For a project like this, hardwood like walnut is ideal because it is durable and visually appealing. Ensure that its food-safe. You can find various wood types at your local lumber store or order them online.
3. Cut the Wood to Size
Using a saw, carefully cut your piece of wood to the dimensions youve chosen. Ensure that the edges are smooth and avoid splinters.
4. Sand the Edges
Once cut, take your sandpaper and smooth out any rough edges or surfaces. Sanding will not only make the board aesthetically pleasing but also safe for food use.
5. Finish the Board
After sanding, apply a coat of food-safe finish. This helps to seal the wood and can be done with a brush or cloth. Wait for it to dry and apply a second coat for added protection.
6. Maintenance Tips
To keep your cheese cutting board in top condition, remember to clean it after each use. Heres where you should learn about proper maintenance. You can read about cutting board care to make sure yours lasts a long time.
Tips for Serving Cheese on Your Board
Once youve created your masterpiece, its time to make a stunning cheese presentation. Use different textures and flavors. Pair soft cheese with crusty bread and hard cheese with crackers for a colorful spread. Decorate with fruits, nuts, and herbs for a delightful finishing touch.
Conclusion
In conclusion, knowing how to make a cheese cutting board is indeed a life-changing skill for kitchen professionals. It allows you to present culinary delights in an aesthetically appealing way that leaves a lasting impression on your guests. By following the steps outlined above, youre not just creating a board but elevating your culinary artistry.

FAQ
1. What type of wood is best for a cheese cutting board?
Hardwoods like maple, walnut, and bamboo are the best choices for a cheese cutting board due to their durability and aesthetic appeal.
2. Can I use a cheese cutting board for other foods?
Yes, while its best to keep a dedicated board for cheeses to prevent cross-contamination, you can use it for other foods as long as it's properly cleaned between uses.
3. How can I maintain my cheese cutting board?
Regular cleaning, oiling with food-safe mineral oil, and occasional sanding when needed will help maintain the look and longevity of your cheese cutting board.
As an Amazon Associate, I earn from qualifying purchases.
