How to Install a Magnetic Knife Holder in Your Kitchen
Are you tired of rummaging through your kitchen drawers to find the right knife? Do you want to free up counter space and keep your knives within easy reach? If so, installing a magnetic knife holder in your kitchen is the perfect solution. Not only does it offer a convenient and stylish way to store your knives, but it also helps to keep them sharp and in good condition. In this article, we will guide you through the process of installing a magnetic knife holder in your kitchen.
Why Choose a Magnetic Knife Holder?
Before we dive into the installation process, let's take a moment to understand why a magnetic knife holder is a great addition to any kitchen. Here are a few reasons why you should consider installing one:
- Space-saving: A magnetic knife holder allows you to free up valuable counter space by keeping your knives securely mounted on the wall or under a cabinet.
- Easy access: With a magnetic knife holder, your knives are always within arm's reach, making meal preparation more efficient and enjoyable.
- Knife protection: Storing your knives in a drawer can cause them to become dull and damaged. A magnetic knife holder keeps your knives safely suspended, preventing them from coming into contact with other utensils and surfaces.
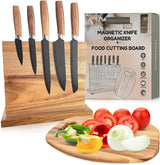
- Organized and stylish: A magnetic knife holder adds a sleek and modern touch to your kitchen decor while keeping your knives neatly organized and on display.
What You Will Need
Before you begin the installation process, make sure you have the following tools and materials:
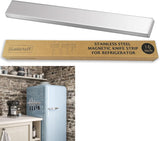
- A magnetic knife holder
- Wall anchors or screws
- A level
- A drill
- A screwdriver
- Measuring tape
Step-by-Step Installation Guide
Step 1: Choose the Right Location
The first step in installing a magnetic knife holder is to choose the right location. Look for a spot in your kitchen that is easily accessible and where the knives will be within reach while you're working. Avoid placing the holder near heat sources or in areas with high humidity, as this can affect the performance of the magnets.
Step 2: Measure and Mark
Once you've chosen the location, use a measuring tape to determine the desired height for your knife holder. Mark the spot on the wall or under the cabinet where you will be installing the holder.
Step 3: Install Wall Anchors or Screws
If you're installing the knife holder on a wall, you'll need to use wall anchors or screws to securely mount it. Follow the manufacturer's instructions to properly install the anchors or screws. If you're installing the holder under a cabinet, you may need to use different mounting hardware, such as brackets or adhesive strips.
Step 4: Mount the Knife Holder
Once the anchors or screws are in place, it's time to mount the knife holder. Hold the holder against the wall or under the cabinet, making sure it is level. Use a level to ensure that the holder is straight, and then mark the spots where the screws or brackets will go.
Step 5: Drill Pilot Holes
Using a drill, carefully drill pilot holes into the marked spots. Make sure the holes are slightly smaller than the screws or brackets you will be using.
Step 6: Attach the Knife Holder
With the pilot holes drilled, attach the knife holder to the wall or under the cabinet using the provided screws or brackets. Tighten them securely, but be careful not to overtighten and damage the holder or the mounting surface.
Step 7: Test the Holder
Once the knife holder is securely mounted, give it a gentle tug to ensure that it is stable and properly installed. Test the magnetic strength by placing a knife on the holder. It should hold the knife securely in place.
Final Thoughts
Installing a magnetic knife holder in your kitchen is a practical and stylish way to store your knives. By following the step-by-step guide provided in this article, you can easily install a magnetic knife holder and enjoy the benefits of easy access, knife protection, and kitchen organization. Say goodbye to cluttered drawers and hello to a sleek and organized kitchen!
