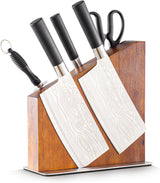
When it comes to creating a beautiful and functional kitchen tool, nothing compares to a chef knife with a hammered finish. The hammered finish not only provides an exquisite aesthetic but also adds tremendous functionality by preventing food from sticking to the blade. If you're excited about stepping into the world of knife-making or simply upgrading your chef knife at home, this article is your comprehensive guide on how to achieve the hammered finish on a chef knife.

Why Opt for a Hammered Finish?
The hammered finish is more than just an eye-catching detail. In both professional and home kitchens, the hammered finish provides significant advantages:
- Preventing Food Stickage: The dimples create air pockets that prevent food from sticking.
- Aesthetic Value: A hammered finish offers a rugged yet sophisticated look.
- Enhanced Grip: The texture can make the knife feel more secure in your hand.
Whether you use your knife daily or for special culinary projects, these benefits make the hammered finish more than just a fancy feature.
Tools You Will Need
Before diving into how to achieve the hammered finish on a chef knife, gather these essential tools:
- Chef Knife (preferably unpolished)
- Ball Peen Hammer
- Workbench with Clamps
- Protective Gear (gloves, goggles)
- Finishing Materials (sandpaper, polishing cloth)

Step-by-Step Guide
Step 1: Preparation
The first step is to ensure that your knife is securely clamped on a workbench. Protective gear is a must to avoid any accidents during this process.
Step 2: Marking the Surface
Using a marker, outline the areas where you want the indentations to go. This will guide you on where to hammer and ensure a consistent pattern.
Step 3: Hammering
Now, it's time to start hammering. Aim for evenly spaced indentations to create the hammered finish. Use the ball peen hammer and strike the marked areas lightly but firmly.
Step 4: Polishing and Finishing
Once satisfied with the hammered texture, remove any rough edges using sandpaper. Finish the job by polishing the knife to achieve a smooth and shiny surface.
Additional Tips
- Consistency: Make sure all the indentations are of relatively the same depth for a uniform look.
- Practice: If you're new to this, practice on a piece of scrap metal before working on your actual knife.
- Finishing: The type of finishing material you use can significantly impact the final look, so choose wisely.
Common Mistakes to Avoid
Even if you follow the steps accurately, mistakes can happen. Here are some pitfalls to watch out for:
- Uneven Hammering: Ensure your hammer strikes are consistent to avoid an unbalanced look.
- Over-Hammering: Striking too hard can damage the knife rather than improving it.
- Lack of Preparation: Always double-check your markings and tool readiness before starting.
Frequently Asked Questions
Can I achieve a hammered finish on a store-bought chef knife?
Yes, you can. However, it is usually easier to achieve a hammered finish on a custom or unpolished knife for better results. For more insights, check out our guide on Upgrade Your Kitchen Experience.
Does a hammered finish affect the durability of the knife?
If done correctly, a hammered finish should not affect the durability. In fact, the finish can provide a better grip, indirectly contributing to longevity. To learn how to handle your knife better, see our article on How to Cut with a Chef's Knife.
What kind of hammer should I use?
A ball peen hammer is recommended for creating the perfect indentations for a hammered finish. You can find more about the tools we recommend in our resource on Where to Buy the Enoking Serbian Chef Knife.
As an Amazon Associate, I earn from qualifying purchases.
For more detailed guidance on different knife finishes and customizations, you might find this knife-making resource helpful. Additionally, understanding how to handle cuts in the kitchen is essential. Read more on Kitchen Safety.
Creating a hammered finish is a remarkable way to add both beauty and functionality to your chef knife. With the right tools, patience, and technique, you'll achieve tremendous results you will be delighted with. Happy crafting!
