
Have you ever wondered how to cut with a Santoku knife? Kitchen enthusiasts and professional chefs alike are delighted by the versatility and precision of this Japanese knife. In this comprehensive guide, we will explore the correct techniques, tips, and tricks to help you master the art of using a Santoku knife. This will not only enhance your cooking experience but also ensure safety in the kitchen.

Understanding the Santoku Knife
The Santoku knife, originating from Japan, is renowned for its versatility in the kitchen. The term 'Santoku' translates to three virtues or uses, which are slicing, dicing, and mincing. Santoku knives are designed with a flat edge and a sheepsfoot blade, typically measuring between 5 to 7 inches. This design allows for precision and control when performing various cutting tasks. Understanding the anatomy of the Santoku knife is crucial before diving into cutting techniques.
Anatomy of a Santoku Knife
- Blade: The blade is typically between 5 to 7 inches long, making it shorter than a traditional chef's knife. It has a flat edge and a sheepsfoot curve towards the tip, allowing for precise control.
- Handle: The handle can be made from various materials, including wood, plastic, and composite. It should fit comfortably in your hand to provide stability.
- Granton Edge: Some Santoku knives feature a Granton edge, which includes small scallops along the blade. These indentations reduce friction and prevent food from sticking to the blade.

Getting Started: Proper Grip and Handling
Before you can effectively learn how to cut with a Santoku knife, it's essential to understand the proper grip and handling techniques. The way you hold your knife directly impacts your cutting efficiency and safety.
The Pinch Grip
To achieve optimal control and precision, many chefs recommend using the pinch grip. Follow these steps to practice the pinch grip:
- Pinch the blade of the knife between your thumb and index finger, just above the handle.
- Wrap your remaining three fingers around the handle for support.
- This grip provides stability and control, making it easier to perform accurate cuts.
The Handle Grip
If you find the pinch grip uncomfortable, the handle grip is another option:
- Hold the handle of the knife securely with all four fingers and your thumb.
- This grip may be more comfortable for beginners but offers slightly less control compared to the pinch grip.

Mastering Basic Cutting Techniques
Slicing
Slicing is one of the primary techniques you will use when learning how to cut with a Santoku knife. The flat edge of the blade makes it ideal for clean, swift cuts. Follow these steps for perfect slices:
- Prep the Food: Ensure your ingredients are clean and properly prepared. Place them on a stable cutting surface.
- Grip the Knife: Utilize either the pinch or handle grip to secure the knife.
- Position the Blade: Place the blade's edge on the food, near the area where you intend to make your cut.
- Slice Downward: With a gentle but firm motion, slice downward and slightly forward, letting the weight of the knife do the work.
Remember, practice makes perfect. The more you practice your slicing technique, the more comfortable and proficient you will become.
Dicing
Dicing involves cutting food into small, even cubes and is essential for many recipes. Use the following steps to dice with a Santoku knife:
- Start with Slices: Begin by slicing the food into even, thin pieces.
- Stack and Slice Again: Stack the slices and cut them into long, even strips.
- Final Dicing: Turn the strips and dice them into small cubes.
This technique is especially useful for ingredients like onions, tomatoes, and peppers.
Mincing
Mincing requires cutting food into extremely fine pieces, perfect for herbs and garlic. Follow these steps to mince with a Santoku knife:
- Start with a Rough Chop: Begin by roughly chopping the food into smaller pieces.
- Rock and Chop: Use a rocking motion, moving the knife back and forth while gradually bringing the blade down to achieve finer pieces.
- Repeated Chopping: Continue chopping until the food reaches the desired fineness.
Advanced Cutting Techniques
Once you've mastered the basics, you can move on to more advanced cutting techniques that showcase the full potential of your Santoku knife.
Julienne
The julienne technique involves cutting food into thin, matchstick-like strips. This is particularly useful for vegetables. Here's how to julienne with a Santoku knife:
- Trim and Slice: Start by trimming the ends of the vegetable. Slice it into even, thin pieces.
- Stack and Slice Again: Stack the slices and cut them into long, thin strips.
Chiffonade
The chiffonade technique is used primarily for leafy greens and herbs. This method involves rolling the leaves tightly and making thin, even slices to create delicate ribbons. Follow these steps to chiffonade with a Santoku knife:
- Roll the Leaves: Stack and roll the leaves tightly into a cylinder shape.
- Slice Thinly: Use a back-and-forth motion to slice the rolled leaves into thin ribbons.
Maintaining Your Santoku Knife
Proper maintenance is crucial to keep your Santoku knife sharp and effective. Here are some tips for maintaining your Santoku knife:
Regular Honing
Honing your Santoku knife daily helps maintain its sharpness. Use a honing rod to straighten the blade's edge and ensure it remains sharp.
For details on honing and sharpening, check out this guide on top knife sharpeners.
Proper Storage
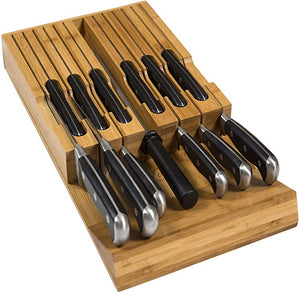
Store your Santoku knife in a knife block, magnetic strip, or protective sheath to prevent damage to the blade and ensure safety in the kitchen.
Professional Sharpening
While honing helps maintain the sharpness, professional sharpening is recommended every 6 to 12 months to restore the blade's edge. Consider taking your knife to a reputable sharpening service for the best results.
Curious about professional knife sets? Check out our guide on professional chef-knives.
Safety Tips When Using a Santoku Knife
Ensuring safety in the kitchen is paramount when learning how to cut with a Santoku knife. Follow these safety tips to prevent accidents:
- Keep Your Knife Sharp: A dull knife requires more force, increasing the risk of slips and injuries. Regularly hone and sharpen your knife to maintain its sharpness.
- Use a Stable Cutting Surface: Ensure your cutting board is sturdy and placed on a non-slip surface to prevent accidents.
- Pay Attention to Your Fingers: Always keep your fingers curled inward, away from the blade, to avoid accidental cuts.
- Store Safely: Store your knife in a secure place to prevent accidents when reaching for it.
- Clean with Care: Handwash your knife immediately after use and dry it thoroughly to prevent corrosion and maintain its longevity.
For a quick refresher on basic knife skills, this guide on knife skills is helpful.
FAQ Section
What foods can I cut with a Santoku knife?
A Santoku knife is versatile and can be used to cut a wide variety of foods. It excels at slicing, dicing, and mincing vegetables, fruits, meats, and herbs.
Is a Santoku knife better than a chef's knife?
It depends on personal preference and the tasks you perform in the kitchen. A Santoku knife offers precision and control for slicing and chopping, while a chef's knife is more versatile for various kitchen tasks.
How often should I sharpen my Santoku knife?
Regular honing helps maintain the sharpness of your Santoku knife. Professional sharpening is recommended every 6 to 12 months, depending on usage.
For more information on maintaining and using different types of knives, you can check out this guide to knife sharpeners.
As an Amazon Associate, I earn from qualifying purchases. For more product recommendations, visit our blog on best Henckels knives.